DIY: Quinoa Pizza
I have been wanting to try this recipe for so long...but, it's definitely one of those must-plan-ahead recipes (something I don't do often when it comes to cooking).
Finally, I got around to it, planned accordingly (or so I thought), and tackled this loooong prep time recipe once and for all. Verdict: It was worth the wait.
I used a recipe from Momtastic to finally give quinoa pizza crust a go, and produced a longwinded snap chat story of the prep and cooking process.
A medium sized bowl
Quinoa (3/4 cup)
Water
A strainer for the quinoa - (you will have 8 hours to get one if you don't already own one)
Salt (1/4 tsp)
Baking Powder (1 tsp)
Blender
Parchment Paper
Cake pan (I used 8" round)
A spatula

Finally, I got around to it, planned accordingly (or so I thought), and tackled this loooong prep time recipe once and for all. Verdict: It was worth the wait.
I used a recipe from Momtastic to finally give quinoa pizza crust a go, and produced a longwinded snap chat story of the prep and cooking process.
For this recipe you will need:
Patience!A medium sized bowl
Quinoa (3/4 cup)
Water
A strainer for the quinoa - (you will have 8 hours to get one if you don't already own one)
Salt (1/4 tsp)
Baking Powder (1 tsp)
Blender
Parchment Paper
Cake pan (I used 8" round)
A spatula
PREP:
Blunder # 1 (there were a few, see: what I did in the 8 hours waiting)
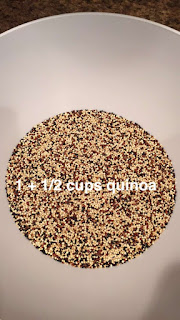
I only had tri-color quinoa.
While it turned out to taste just fine,
the color was certainly a little strange.
So, maybe best to opt for plain (one color) quinoa.
The recipe from Momtastic calls for 3/4 cup quinoa
...I was cooking for 2, so I doubled it to 1 + 1/2 cups.
This part was easy.
#nailedit
I set a timer for 8 hours on my phone so I wouldn't forget.
WAIT TIME:
In hindsight, I probably should've also snapped
all of the things I did in those 8 hours just for measure
(and comedy).
Things I did (regarding this recipe) in those 8 hours:
Panicked because I only have a magic bullet,
and a blender or food processor is required
Called Mom
- acquired Mom's blender
Thanked Mom for also noticing I needed parchment paper
- acquired Mom's parchment paper
Got home from Mom's and realized I needed a strainer too,
panicked again, called Mom
- acquired Mom's strainer
Took inventory of all the things I needed to buy:
-parchment paper
-food processor
-strainer
Preheat your oven to 425!
Pour the quinoa into a stainer to remove excess water.
BLENDER:
Again, I doubled the recipe, so I used 1/2 cup water here.
I try not to over do with with salt...
so, I stuck with what the recipe called for here.
1/4 tsp.
I doubled, so, 2 tsp baking powder.
Took a little longer than anticipated.
I stopped and stirred a few times, too.
PREP & FILL CAKE PAN(S):

My darling fiancé says the only thing I make in the kitchen is a mess,
I'm working on that...
After the 15 minute timer goes off, take the cake pan out of the oven.
The color was a little weird...
again, this is why I think opting for 1 color of quinoa
might make for a more aesthetically pleasing crust.
(Side note: it did taste better than it looked)
* Flipping the crust was easier than I thought it would be! *
#nailedit
Like I said in the beginning....
Just being honest #hangry
Once it's out of the oven:
Enjoy!
xx
MP


Love, love, love your blogs!!!
ReplyDelete